If you’re a voiceover artist, a podcaster, or a content creator, you know that great vocal quality is non-negotiable. It’s what keeps your audience engaged and makes your content sound professional. But what if you’re not in a professional studio with an audio engineer? How can you get that polished, studio-quality sound from your home setup?
The answer lies in a powerful vocal chain which you can download for FREE in the links below. In this tutorial, we’ll break down the essential steps and plugins you need to create the ultimate voiceover vocal chain, turning your home recordings into broadcast ready vocals. We’ll be using the Waves StudioVerse Audio Effects plugin chainer to build our chain—a free and powerful tool that lets you stack and customize your plugins as a single insert (in the DAW of your choice) with ease.
Disclosure: This video is sponsored by Waves Audio.
Step 1: Clean Up Your Room and Your Recording
One of the biggest challenges of recording at home is dealing with unwanted noise. This could be anything from the echo in a large room to the hiss of your microphone. The first step is to clean up your audio so you have a solid foundation to build on.
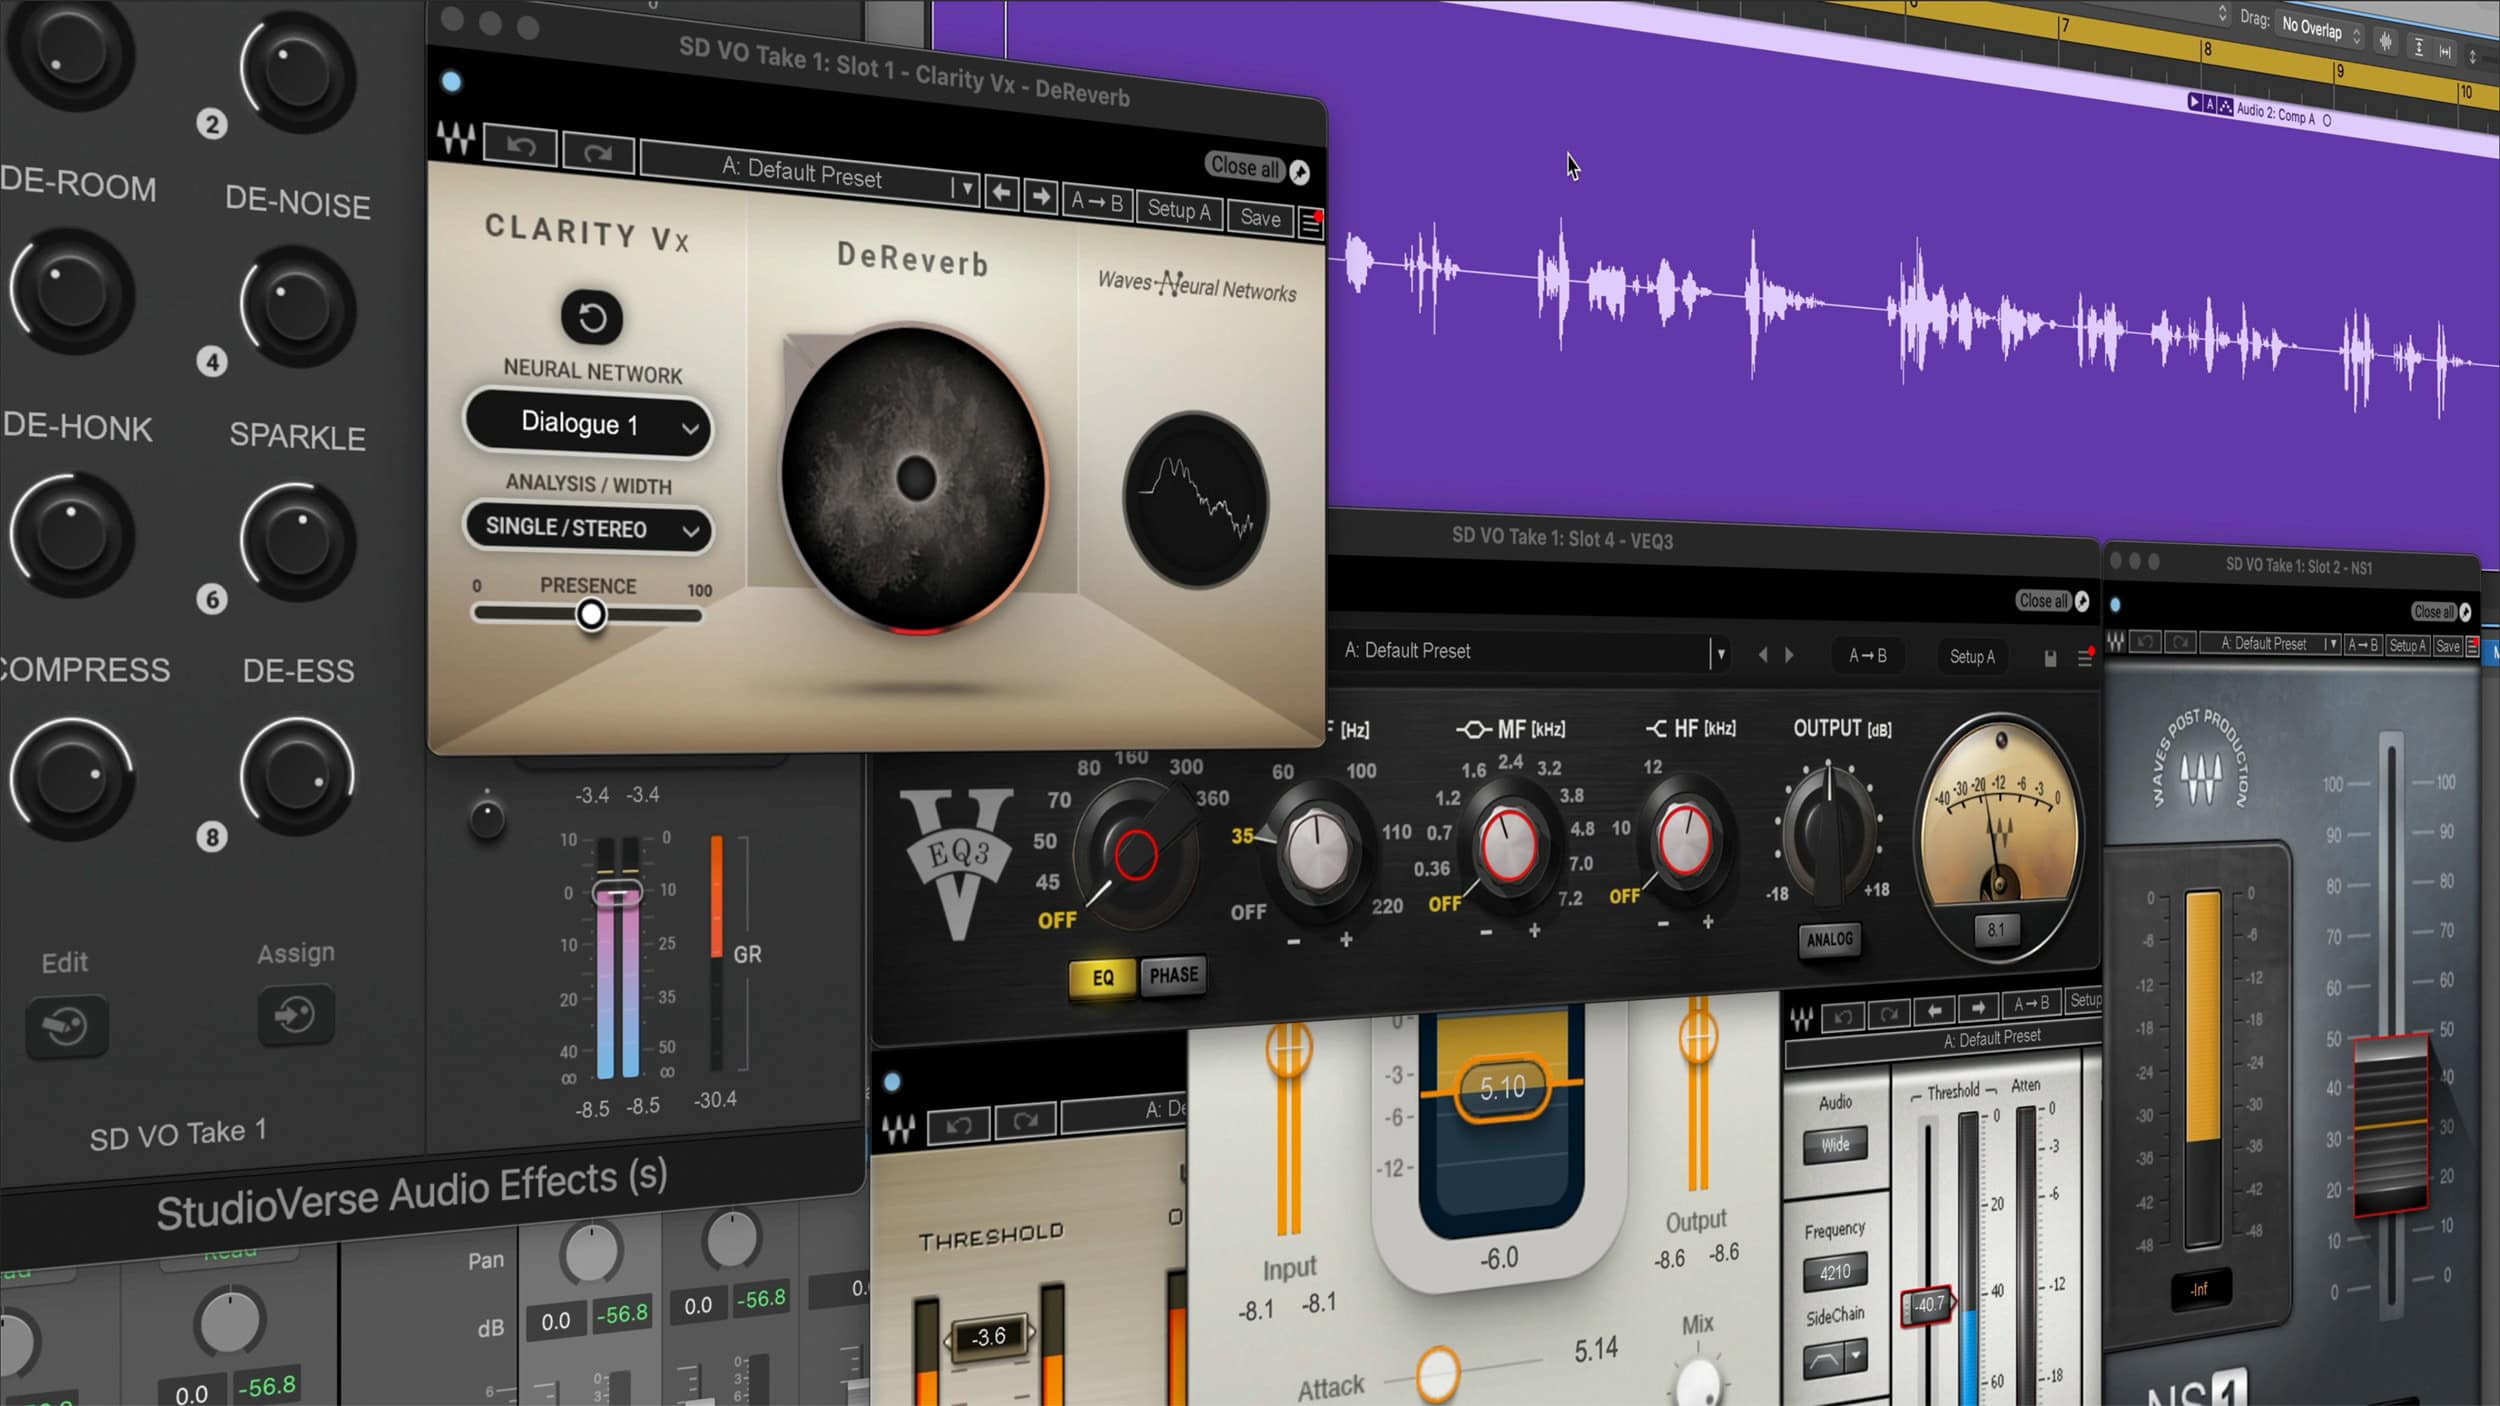
- Clarity VX DeReverb: This plugin is a game-changer for anyone dealing with room reverb or echoes. It works by intelligently reducing those unwanted reflections, giving your vocal a tight, close-mic’d sound. Even if you don’t have a lot of echo, this plugin can help you get that “vocal booth” feel.
- NS1 Noise Suppressor: Next, use the NS1 to tackle any background noise, like microphone hiss or electronic hum. A little goes a long way with this one—you want to reduce the noise without sacrificing the detail in your voice. The NS1 is one of the most underrated plugins for voiceover work, and for good reason!
Step 2: Sculpt Your Tone with EQ
Once your audio is clean, it’s time to shape its tone. An EQ (equalizer) is a crucial tool for optimizing your vocal’s frequencies.
- VEQ3: The VEQ3 is a great choice for this, and it’s included in the free Waves plugin pack. Start by using the high-pass filter to roll off low-end rumble and plosives. This helps your voice cut through the mix without sounding muddy.
- Tame the Harshness: Identify and gently reduce harsh mid-frequencies in your voice. This can be different for everyone, but a common range is between 2-4kHz.
- Add Sparkle and Presence: Boost the high frequencies (around 12kHz and up) to add crispness and “air” to your vocal. This helps your voice sound more present and professional, especially when it’s competing with music or other sound effects.
Step 3: Tame the Sibilance
With that new high-end sparkle, you might notice your “S” sounds are a bit too sharp or hissy. This is where a de-esser comes in.
- Waves DeEsser: This classic plugin is a go-to for many audio professionals. It’s designed to specifically target and reduce those harsh sibilant sounds. By setting the frequency to where your sibilance is most prominent, you can control it without making your voice sound unnatural or lispy.
Step 4: The Power of Compression
Compression is arguably your most powerful tool for voiceover. It evens out the dynamic range of your vocal, making quiet parts louder and loud parts quieter, resulting in a consistent and impactful sound. For the ultimate vocal chain, we’ll use a serial compression approach (utilizing more than one compressor plugin).
- RComp (Renaissance Compressor): The RComp acts as your “glue” compressor. Set a moderately high ratio (around 5:1) with a fast attack and a slower release. This will gently bring your dynamics together, making the vocal feel more cohesive.
- RVox (Renaissance Vox): Next, use the RVox to push your vocal even further forward in the mix. This plugin is incredibly simple to use and is perfect for making sure your voice cuts through music, sound effects, or other elements.
Step 5: Final Polish with Limiting and R Bass
To get the most out of your vocal and ensure it’s loud and clear without clipping, a limiter is essential. The L2 Limiter is a fantastic choice. Set your ceiling just below zero (around -1 dB) to prevent any digital clipping, and then push the threshold down to increase the overall level of your vocal.
Finally, for that big, “Hollywood” sound, add the R Bass plugin. While it’s designed for bass, placing it strategically in your vocal chain (after noise reduction but before compression) can add a rich, low-end weight to your voice, making it sound fuller and more authoritative.
Your Professional Vocal Chain Awaits
By following this step-by-step guide, you can create a powerful vocal chain that will elevate your voiceover recordings, no matter where you’re recording. Each of these plugins works together to clean, shape, and amplify your voice, giving you that polished, professional sound you’re looking for.
Ready to try it for yourself? The Waves StudioVerse plugin chainer makes it easy to download this exact preset and start getting that professional sound today 👇
Divine Voice Over Pro – FREE StudioVerse Vocal Chain
Disclosure: This website contains affiliate links to brand partners, recommended products and services. A small commission may be generated on sales through these links, at no additional cost to you. I appreciate your support as this helps me continue to create content.